Concha Fiesta!
- Rachel Madsen

- Dec 12, 2025
- 3 min read
Happy Fashion Friday, and welcome back to my sewing blog!!!!
I'm two weeks out from her first Birthday and first Birthday party as I create this dress. Which means I'm already behind on Baby's Birthday Dress!!!

I knew I wanted a concha themed fabric for her princess dress. I found this super cute cotton from Nice Cosas. https://nicecosas.com/
I ordered 2 yards not really sure how much I was gonna need for this project.
I didn't take any pictures of my layout because all the pieces had to be cut one at a time. I had to be really careful that my pan dulce was all facing the right direction as this fabric is a directional fabric.

We're using pattern Simplicity 4246 to make our dress.

I started by sewing my ties, I made sure to clip, turn, and press them.

They were then sewn in place to the sides of my bodice front.

Stay stitched bodice front and back front at the neckline. I always recommend this extra step.

I then sewed front to to back at the side seams and shoulder seams of my bodice. Repeat for the lining.

Moving on to the sleeves I gave them a very thin rolled hem.

I cut some bias tape and placed it 3/4 of an inch away from the hem. Sewed that down and strung the elastic.

Here are my completed sleeves.

Attached the lining to the bodice, then the sleeves to the bodice/lining. But I didn't pay attention to my notches and sewed them on backwards. I had to use my seam ripper to take them off and sew them on the right way lol.
I don't like setting the sleeve this way when working in a really small space (like with children's clothes). I usually prefer to attach the sleeve open and then sew the sides. I didn't do that here because I'm following the directions for a change lol.


Skirt Self: I sewed the side seams and back seam to the notch. I used a wide stitch to gather the skirt.

Underskirt: Wrong sides together I sewed side seams and back seam to the notch. 3/8 of an inch.

Trimmed my seams down to a 1/4 of an inch.

I then flipped my seams over (right sides touching) and sewed down another 3/8 of an inch creating French seams. This technique is typically used on sheer fabric, like this organza I'm using as an underskirt.


Again I used a wide stitch to gather the underskirt.


Lining: I sewed my side seams and back seam to the notch. I sewed in a very thin hem, and then gathered the skirt lining as I had with the other two skirts. Now its time to assemble the dress!!!

Skirt: I attached this to the bodice/bodice lining right sides together.

Underskirt: I repeated the process.

Lining: I attached this to the bodice/bodice lining wrong sides together.
Each new layer adds fullness to the dress. The more layers, the puffer the skirt becomes.

I added horsehair boning to both the cotton and organza layers to to stiffen the hem. I want my baby's dress to be a fluffy as possible!

I went to put in a zipper, but didn't have one 12 inches long. I did have a 20 in, if you hadn't heard, they're really easy to cut down. Measure the length you need, add a little bar tack, and cut. So easy!
After installing the zipper I pressed the whole dress. And we are done! The perfect princess dress for her Concha themed birthday party!!!


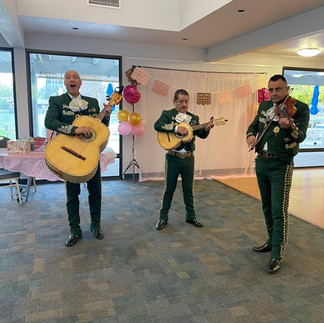


And here ate some pictures from the party!!!


Comments